How to Install Java_home in Windows 10
Install Mysql on Windows 10 Step by Step
In this tutorials, I am going to show how to install Mysql on Windows 10 operating system.
Install Mysql on Windows 10:
I hope this step by step process to install Mysql on Windows 10 will help you better.
Version Information:
- Windows 10 Pro
- Mysql Community Server 8.0.12
Step 1:
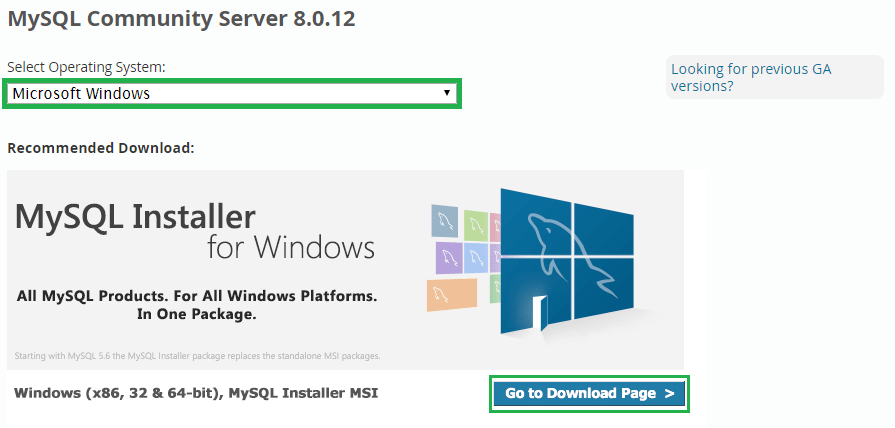
Download the latest Mysql Community server from MySQL official website. For me, it is 8.0.12, if the version differs you no problem the installation steps will be the same.
By clicking on the above URL, you will see the below options. Select your operating system (Microsoft Windows) and click on Go to Download Page. It will redirect you the actual download page for windows Mysql server.
Step 2:
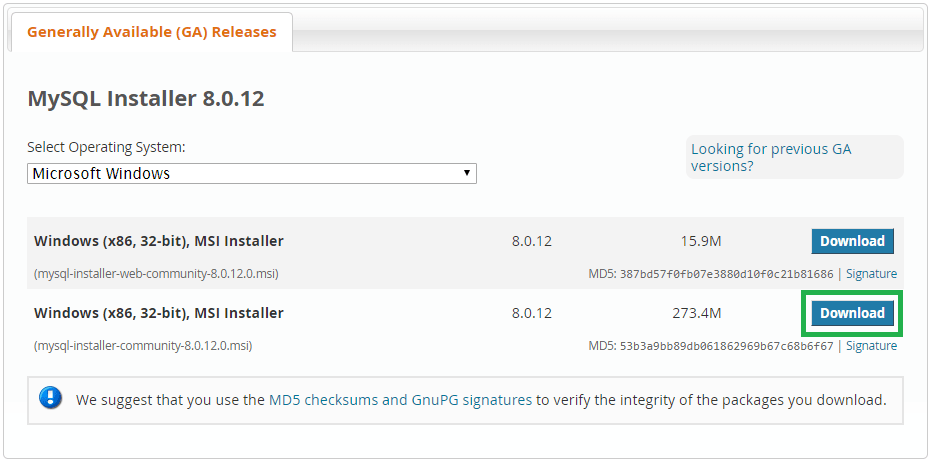
It will show you Generally Available (GA) Releases. Where we can see two different installers, one is a web community installer which comes as a little file and another one is MySQL installer community. Click the Download button on the second one (mysql-installer-community).
Step 3:
It will ask your MySQL credentials to download the .msi file. If you have your credentials, you can log in or else if you wish to sign up now you can click on the green coloured signup button.
If you are not interested in login or sign up for now, you can directly go and click onNo thanks, just start my download option. It will download selected MySQL for you on your local machine.

Step 4:
Go to your downloads folder where you can see the mysql-installer-community file, right click on that file and click Install option.

Step 5:
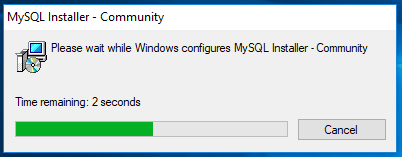
This window configures the installer, in the middle, it may ask you for permissions to change your computer settings or firewall confirmation, you can accept and then it will take a few seconds to configure the installer.
Step 6:
Read the license agreement and accept the license terms.

Step 7:
This window provides you to set up different types of MySQL installations. You can set up Mysql in 5 different types as provided below. Now I am selecting the Developer Default as I am a developer so that I need all the products which help my development purposes. Click on Next.

Step 8:
Based on your Windows configuration, it may prompt you like "One or more product requirements have not been satisfied". You can just click on YES.

Step 9:
Click on Execute.

Step 10:
Upon execution of the previous step, the installer grasps all recommended products in place and asking for our approval to execute the product installation process. Click on Execute.

Step 11:
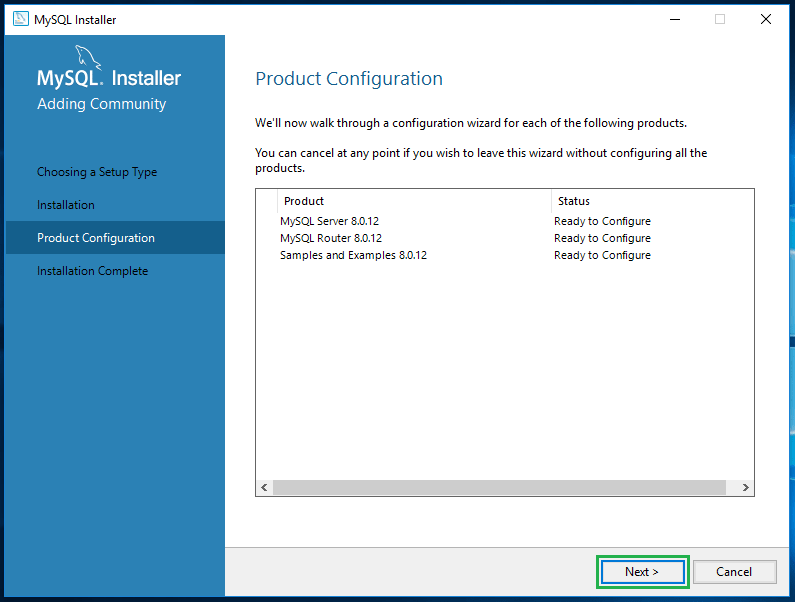
Upon successful execution of all required products, now the MySQL allows us to configure the server settings. Click on Nextto configure the server.
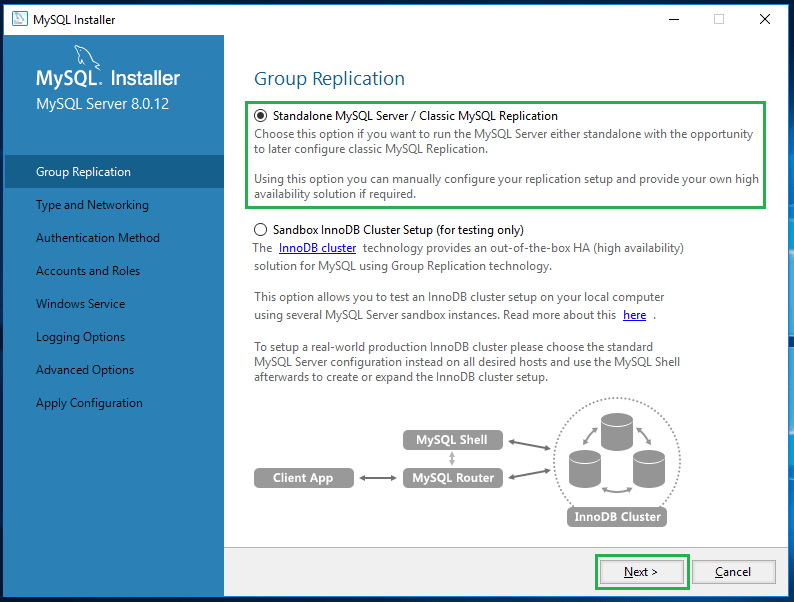
Step 12:
This step allows you to configure the server. We can set the server in two different modes. One is a standalone mode, and another one is cluster mode. I don't want to make it as a cluster because I am installing MySQL for development purpose so that I am selecting Standalone MySQL server and click on Next.
Step 14:
Choose the Development Computer option from Config Type drop-down. You can find the following controls like TCP/IP, Port and X Protocol Port. If you wish to configure your port, you can change here itself and click on Next. For now, I am leaving as its default configuration.

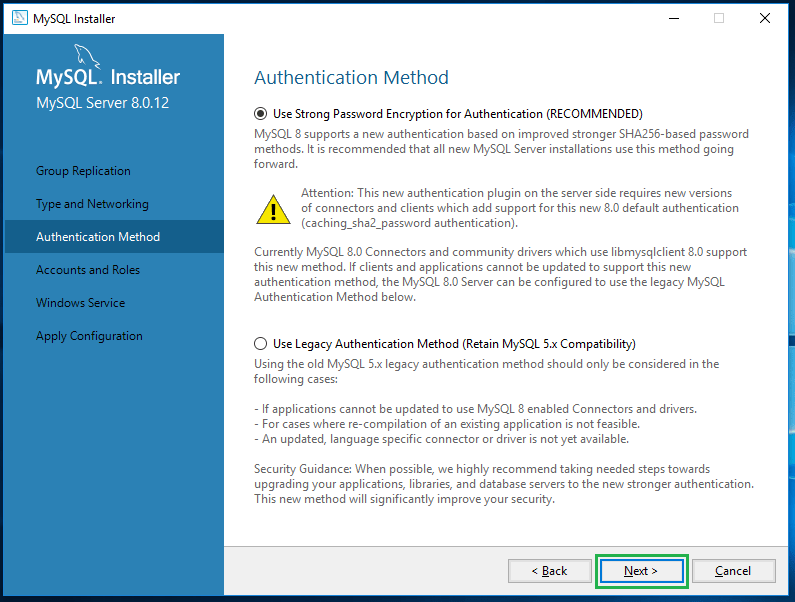
Step 15:
It is prompting you to select the authentication method, leave it as the default recommended method and click on Next.
Step 16:
Here you can set your MySQL root user password. If you wish to create a new user, you can click on Add User button under MySQL user accounts section.

Step 17:
Upon clicking on Add User button, you will get the user details popup which allows you to create a new user account. After creating the user click on Next.

Step 18:
Leave the service details as default and click on Next.

Step 19:
Press Execute to apply the configurations on the previous step.

Step 20:
Upon execution, you can see the below green coloured ticks on every configuration option and finally you will getFinish button.

Click on Finish you got your MySQL on your Windows 10 operating system.
Testing:
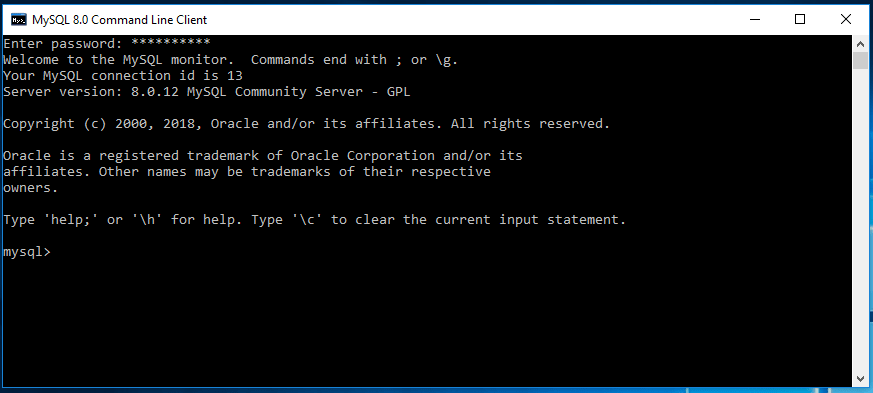
Search for MySQL in your taskbar search item. There you can see all MySQL products which we installed and click on MySQL client; it will ask your MySQL password to login, after successful login you could see the MySQL prompt like below.
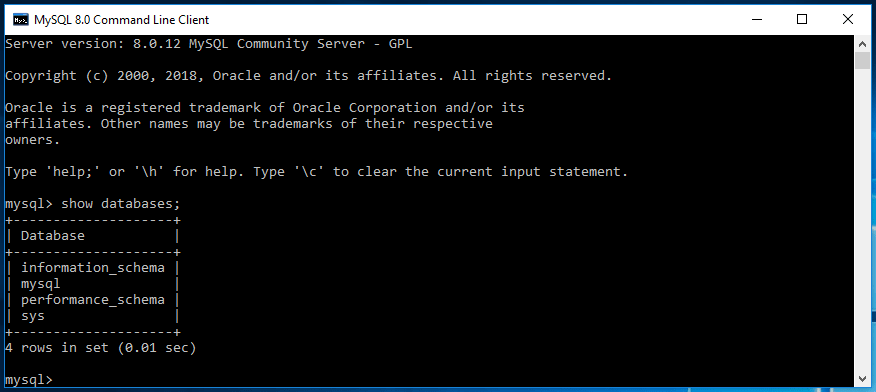
MySQL comes along with some default databases. We can see the databases by using show databases command.
We are completely done with the installation process, so now let's create a table in it.
Happy Learning 🙂
How to Install Java_home in Windows 10
Source: https://www.onlinetutorialspoint.com/mysql/install-mysql-on-windows-10-step-by-step.html

0 Response to "How to Install Java_home in Windows 10"
Post a Comment